Irrigation Controller
An efficient irrigation Controller requires more than installing sprinklers and setting timers. In order to maximize water conservation and plant health, it is essential to design an irrigation controller that accurately delivers water to your landscape while minimizing waste.
In this article, we will outline the steps involved in designing an irrigation controller for your landscape, including choosing the right type of irrigation system, selecting the appropriate controller, and maintaining your system.
Step 1: Determine your Water Needs
The first step in designing an irrigation system is to determine your landscape’s water needs. Factors such as plant type, climate, soil type, and sun exposure all play a role in how much water your landscape requires. For example, a lawn will require more water than a bed of succulents. To determine the appropriate watering schedule, you can use online resources or consult a landscaping professional.
Step 2: Select the Right Irrigation System
Once you’ve determined your water needs, the next step is to choose the appropriate irrigation system. Common irrigation systems include sprinkler systems, drip irrigation systems, and soaker hoses.
Sprinkler systems are best suited for large, open areas such as lawns or sports fields. They are easy to install and cover a wide area, but their above-ground nature makes them vulnerable to wind and evaporation.
Drip irrigation systems are a more efficient choice for landscapes with plants that have varying water needs, such as perennial beds or vegetable gardens. Drip systems deliver water directly to the plant’s root zone, minimizing runoff and evaporation. They are also less prone to water waste due to wind.
Soaker hoses are an alternative to drip irrigation systems. They are made from a porous material that allows water to seep out and into the soil slowly. Like drip systems, soaker hoses are best suited for perennial beds or gardens.
Step 3: Choose the Right Irrigation Controller
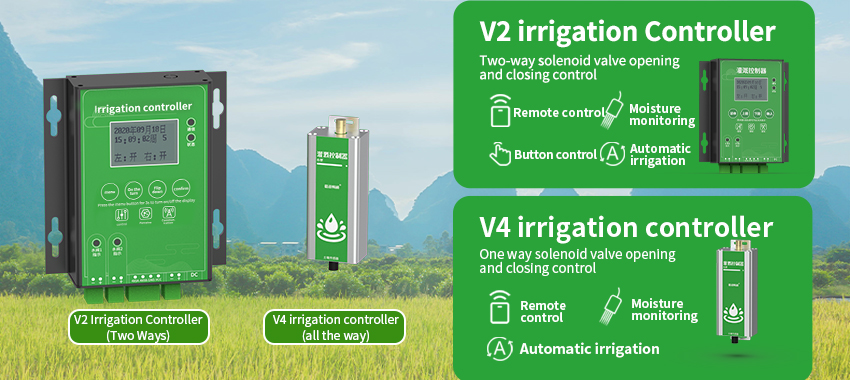
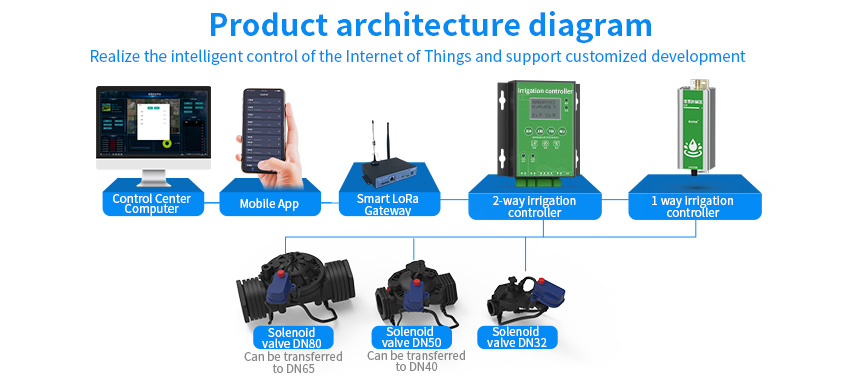
The irrigation controller is the brain of your irrigation system. It allows you to set watering schedules and adjust the amount of water delivered to each zone. When choosing an irrigation controller, consider factors such as the number of zones you need to irrigate, the type of programming options you want, and the ability to connect with weather or soil moisture sensors.
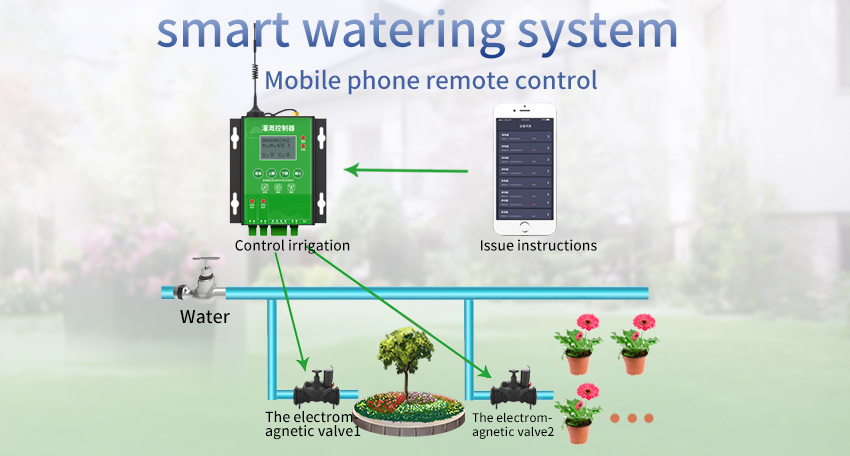
Controllers typically come in two types: “smart” controllers and traditional controllers. Smart controllers utilize real-time weather data to adjust the watering schedule, while traditional controllers rely on preset programs that must be manually adjusted.
Step 4: Installation and Maintenance
Once you’ve chosen your irrigation system and controller, it’s time to install and maintain your system. Proper installation is crucial to prevent water waste and damage to plants. We recommend working with a professional landscaping company to ensure that your system is installed correctly.
Regular maintenance is also essential to keeping your irrigation system running efficiently. You should regularly check for leaks, broken sprinkler heads, and clogs in drip lines. You should also adjust your watering schedule based on the weather and season, as plants have different water needs in different conditions.
Conclusion
Designing an efficient irrigation controller for your landscape requires careful consideration of factors such as water needs, irrigation system type, and controller features. By following the steps outlined in this article and working with a professional landscaper, you can create an irrigation system that optimizes water usage and plant health, while minimizing waste.
I am extremely inspired with your writing talents as well as with the format in your blog. Is this a paid topic or did you modify it your self? Either way stay up the nice high quality writing, it’s rare to peer a nice blog like this one these days!