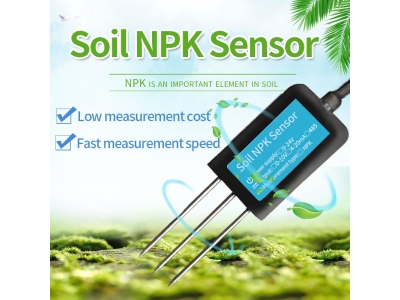
Soil NPK sensors are sophisticated tools used in agriculture to monitor the nutrient levels of soil. These sensors provide valuable information on the availability of nitrogen (N), phosphorus (P), and potassium (K), which are essential for plant growth and development. In this article, we will discuss the installation procedure of soil NPK sensors, highlighting the steps involved and the considerations to ensure accurate and reliable measurements.

Selecting the appropriate sensor:
Considerations include the sensor’s measuring range, compatibility with the soil type, required measurement accuracy, and the desired data output format. Consulting with experts or manufacturers can help in making an informed decision.
Preparing the soil:
Start by removing any surface debris, such as rocks or plant residues, that may obstruct the sensor’s contact with the soil. If the soil is compacted, loosen it using a shovel or tillage equipment. The soil should be representative of the area to be monitored, so take samples from various locations and mix them thoroughly.
Determining the installation depth:
Generally, a depth of 15-30 cm is recommended as it ensures measurement accuracy while being representative of the nutrient availability in the root zone. However, depending on the crop’s requirements and soil conditions, the depth may vary. Consult crop specialists or agronomists to determine the appropriate installation depth.
Digging the hole:
Once the installation depth is determined, dig a hole using a shovel or an auger. The hole should be wide enough to accommodate the sensor probe and its surrounding backfill. Take care not to damage the sensor probe during digging. The size of the hole should be slightly larger than the probe to allow for easy insertion and removal.
Inserting the sensor:
Gently insert the soil NPK sensor probe into the hole, ensuring that it reaches the desired installation depth. The probe should be in direct contact with the soil for accurate measurements. Avoid forcing the probe or causing any damage to it. The sensor’s cable should be positioned and secured to prevent any interference during measurements.
Backfilling and securing the sensor:
After inserting the sensor probe, carefully backfill the hole with the same soil that was removed during digging. Take care to avoid air gaps or loose soil around the probe, as this can affect the accuracy of the measurements. Compact the soil around the sensor to ensure it remains in position and maintains a stable connection with the surrounding soil.
Verifying the installation:
Verify the connection between the sensor and the data logger or monitoring system. Conduct a test by taking preliminary readings to ensure the sensor is functioning correctly. Check for any abnormal values or errors that may indicate issues with the installation or sensor calibration.
Calibrating the sensor:
Calibration involves comparing the sensor’s readings with laboratory analysis of soil samples. Follow the manufacturer’s instructions for calibration procedures, as they may vary depending on the sensor model and the nutrient being measured.

Periodic maintenance and data analysis:
and checking for any signs of damage. Keep a record of measurements taken at different intervals and analyze the data to observe trends, identify nutrient deficiencies or imbalances, and inform fertilizer application or soil management decisions.
Conclusion:
By following the installation procedure outlined in this article and considering factors such as sensor selection, soil preparation, installation depth, backfilling, calibration, and regular maintenance, farmers can effectively monitor soil nutrient levels and make informed decisions to optimize crop growth and maximize yields.